Simple Folder copy using rsync over ssh

So sometimes you have a folder on one machine that you just need on another one.

We are GREAT FANS of ssh, and we think it’s a perfect secure tunnel for performing such operations.  So the question asked was how do you synchronise /path/to/folder  on the local machine to a remote machine using:

  1. Linux Ubuntu
  2. SSH
  3. A private SSH keyfile
  4. Over a non-standard SSH port

Well, since this linux, it’s actually rather boringly easy:

rsync -r -a -v -e 'ssh -p12345 -i .ssh/rsa-keyfile' /path/to/folder [email protected]:/home/username/path/to

This copies (if necessarily CREATING) ‘folder’ on the local machine to our remote one.  There are however some very important details.

Do NOT add a training ‘/’ to the paths if you want rsync to automatically create the directories.  So use this:

/path/to/folder   [email protected]:/home/uname/path/to

Not this:

/path/to/folder/   [email protected]:/home/uname/path/to/

The latter copies the files (and sub-directories) in /path/to/folder, whereas the former copies the folder, its contents and all its sub-directories, and thus creates the directory ‘folder’ at the remote machine if it does not exist.

Happy rsync’ing


OpenSSH Vulnerability

We really don’t like headlines like this, but that doesn’t stop them coming:

The good news is that this is an FYI post, but the bad news is that ssh with public key authentication is affected.  And we use public keys.  And we are not changing as it’s still way safer than a friggin username/password login.

A private key password (that is never ‘remembered’) and 2FA helps.  But an OpenSSH update can’t come soon enough for us.


Dodging the latest Intel CPU issues

****  UPDATE 27-AUG-2018   ****

We came across a nice article from our favourite cloud hosting software company (Nextcloud) on this vulnerability issue:

Security flaw in CPU’s breaks isolation between cloud containers

**** END OF UPDATE  ****

We noted a report on new Intel CPU security flaws:

“Intel’s chips are riddled with more speculative execution vulnerabilities”

Details are here.

On further reading, we note that two of the three issues are already fixed by Intel. Very cool. The unpatched issue relates to potential malicious containers operated by a third party.  Well the good news for us is we self host all of our containers, and we don’t allow third parties to host anything on our servers. Dodged a bullet there then.

If you use a Virtual Private Server (VPS) – i.e. if you basically host your IT services in someone else’s machine, you might want to rethink that strategy, as your service provider might be unwittingly hosting hackers who are out to Snoop on your containers.

Why LXC

We deploy LXC containers in quite literally ALL of our production services.  And we have several development services, ALL of which are in LXC containers.

Why is that?  Why do we use LXC?

The truthful answer is “because we are not Linux experts”.  It really is true.  Almost embarrassingly so in fact.  Truth is, the SUDO command scares us: it’s SO POWERFUL that you can even brick a device with it (we know.  We did it).

We have tried to use single machines to host services.  It takes very little resources to run a Linux server, and even today’s laptops have more than enough hardware to support even a mid-size business (and we are not even mid-size).  The problem we faced was that whenever we tried “sudo” commands in Linux Ubuntu, something at sometime would go wrong – and we were always left wondering if we had somehow created a security weakness, or some other deficiency.  Damn you, SuperUser, for giving us the ability to break a machine in so many ways.

We kept re-installing the Linux OS on the machines and re-trying until we were exhausted.  We just could not feel COMFORTABLE messing around with an OS that was already busy dealing with the pervasive malware and hacker threats, without us unwittingly screwing up the system in new and novel ways.

And that’s when the light went on.  We thought: what if we could type in commands without worrying about consequences?  A world where anything goes at the command line is…heaven…for those that don’t know everything there is to know about Linux (which of course definitely includes us!).  On that day, we (re-) discovered “virtual machines”.  And LXC is, in our view, the BEST, if you are running a linux server.

LXC allows us to create virtual machines that use fewer resources than the host; machines that run as fast as bare-metal servers (actually, we have measured them to be even FASTER!).  But more than that, LXC with its incredibly powerful “snapshot” capability allows us to play GOD at the command line, and not worry about the consequences.

Because of LXC, we explore new capabilities all the time – looking at this new opensource project, or that new capability.  And we ALWAYS ALWAYS run it in an unprivileged LXC container (even if we have to work at it) because we can then sleep at night.

We found the following blog INCREDIBLY USEFUL – it inspired us to use LXC, and it gives “us mortals” here at Exploinsights, Inc. more than enough information to get started and become courageous with a command line!  And in our case, we have never looked back.  We ONLY EVER use LXC for our production services:

LXC 1.0: Blog post series [0/10]

We thank #UBUNTU and we thank #Stéphane Graber for the excellent LXC and the excellent development/tutorials respectively.

If you have EVER struggled to use Linux.  If the command line with “sudo” scares you (as it really should).  If you want god-like forgiveness for your efforts to create linux-based services (which are BRILLIANT when done right) then do yourself a favor: check out LXC at the above links on a clean Ubuntu server install.  (And no, we don’t get paid to say that).

We use LXC to run our own Nextcloud server (a life saver in our industry).  We operate TWO web sites (each in their own container), a superb self-hosted OnlyOffice document server and a front-end web proxy that sends the traffic to the right place.  Every service is self-CONTAINED in an LXC container.  No worries!

Other forms of virtualisation are also good, probably.  But if you know of anything as FAST and as GOOD as LXC…then, well, we are surprised and delighted for you.

Regards,

SysAdmin ([email protected])


Interactively Updating LXC containers

We love our LXC containers.  They make it so easy to provide and update services – snapshots take most of the fear out of the process, as we have discussed previously here.  But even so, we are instinctively lazy and are always looking for ways to make updates EASIER.  Now it’s possible to fully automate the updating of a running service in an LXC container BUT a responsible administrator wants to know what’s going on when key applications are being updated.  We created a compromise, a simple script that runs an interactive process to backup and update our containers.  It saves us repetitively typing the same commands, but it still keeps us fully in control as we answer yes/no upgrade related questions.  We thought our script is worth sharing.  So, without further ado, here’s our script, which you can just copy and paste to a file in your home directory (called say ‘update-containers.sh’).  Then just run the script when you want to update and upgrade your containers.  Don’t forget to change the name(s) of your linux containers in the ‘names=…’ line of the script:

#!/bin/bash
#
# Simple Container Update Script
# Interactively update lxc containers

# Change THESE ENTRIES with container names and remote path:
#
names='container-name-1 c-name2 c-name3 name4 nameN'

# Now we just run a loop until all containers are backed up & updated
#
for name in $names
do
echo ""
echo "Creating a Snapshot of container:" $name
lxc snapshot $name
echo "Updating container:" $name
lxc exec $name apt update
lxc exec $name apt upgrade
lxc exec $name apt autoremove
echo "Container updated. Re-starting..."
lxc restart $name
echo ""
done
echo "All containers updated"

Also, after you save it, don’t forget to chmod the file if you run it as a regular script:

chmod +x container-update.sh

Now run the script:

./container-update

Note – no need to run using ‘sudo’ i.e. as ROOT user- this is LXC, we like to be run with minimal privileges so as not to ever break anything important!

So this simple script, which runs in Ubuntu or equivalex distro, does the following INTERACTIVELY for every container you name:

lxc snapshot container #Make a full backup, in case the update fails
apt update             #Update the repositories
apt upgrade            #Upgrade everything possible
apt autoremove         #Free up space by deleting old files 
restart container      #Make changes take effect

This process is repeated for every container that is named.  The ‘lxc snapshot’ is very useful: sometimes an ‘apt upgrade’ breaks the system.  In our case, we can then EASILY restore the container to its prior updated state using the ‘lxc restore command.  All you have to do is firstly find out a containers snapshot name:

lxc info container-name

E.g. – here’s the output of ‘lxc info’ on one of our real live containers:

sysadmin@server1:~lxc info office

Name: office
Remote: unix://
Architecture: x86_64
Created: 2018/07/24 07:02 UTC
Status: Running
Type: persistent
Profiles: default
Pid: 21139
Ips:
eth0: inet 192.168.1.28
eth0: inet6 fe80::216:3eff:feab:4453
lo: inet 127.0.0.1
lo: inet6 ::1
Resources:
Processes: 198
Disk usage:
root: 1.71GB
Memory usage:
Memory (current): 301.40MB
Memory (peak): 376.90MB
Network usage:
eth0:
Bytes received: 2.52MB
Bytes sent: 1.12MB
Packets received: 32258
Packets sent: 16224
lo:
Bytes received: 2.81MB
Bytes sent: 2.81MB
Packets received: 18614
Packets sent: 18614
Snapshots:
http-works (taken at 2018/07/24 07:07 UTC) (stateless)
https-works (taken at 2018/07/24 09:59 UTC) (stateless)
snap1 (taken at 2018/08/07 07:37 UTC) (stateless)

The snapshots are listed at the end of the info screen.  This container has three: the most recent being called ‘snap1’.  We can restore our container to that state by issuing:

lxc restore office snap1

…and then we have our container back just where it was before we tried (and hypothetically failed) to update it.   So we could do more investigating to find out what’s breaking and then take corrective action.

The rest of the script is boiler-plate linux updating on Ubuntu, but it’s interactive in that you still have to accept proposed upgrade(s) – we call that “responsible upgrading”.  Finally, each container is restarted so that the correct changes are propagated.  This gives a BRIEF downtime of each container (typically 1-several seconds).  Don’t do this if you cannot afford even a few seconds of downtime.

We run this script manually once a week or so, and it makes the whole container update process less-painful and thus EASIER.

Happy LXC container updating!

‘Protectimus’ – A Better 2FA Android App

We don’t usually review android apps, but this one is worth a mention, especially if you have to deploy second-factor-authentication (2FA) in your IT systems (as we do).  The Google Authenticator 2FA app is perhaps the most common app, and it was one we used for providing 2FA login for our key accounts…until now.

We have always had an issue with Google’s 2FA on the android devices.  Modern android phones are unlocked via bio-metric settings, which sounds really cool, but we think they are really weak.  Fingerprints, faces and even voices can be all used to “conveniently” unlock android devices.  Breaking into an android phone is thus easy for the determined hacker who has physical possession of an android device (e.g. phone).  This makes all the apps on an android device susceptible to “easier” hacking, because once you bypass the weak bio-metric login, the entire device is at your disposal.  Add to that, the major security weakness caused by the “convenience” of having passwords auto-entered for logging into regularly visited web sites by your browser (like e.g. Google’s Chrome password-manager) then it’s relatively EASY to find that secure sites are actually less secure on a lost/stolen, unlocked android phone: the second factor might be the ONLY factor preventing unauthorised account access  And if you have 2FA deployed, even that’s no good if your 2FA code generation app is on the lost/stolen phone.  The codes are on available by simply opening the app.  In our opinion, this contributes to our view that android phones are a WEAK POINT for security.

Enter ‘Protectimus Smart OTP‘ – a relatively new android app that is another implementation of the Google App.  It too can be used to scan QR codes and produce 2FA login credentials.  BUT, this app has a separate PIN that you can optionally configure to open the app…so it can’t be opened with the standard android device login credentials (like a fingerprint), as shown in the screenshot below:

The app is built well: even if you try to use the task-switcher (built-into most android devices), the app cleverly hides the 2FA codes.  We know: we checked!  You have to UNLOCK the app to use it, as shown below:

Very nice!  By comparison, Google’s 2FA app is MUCH less secure and offers no protection to a lost/stolen, unlocked android device.

We think this is app represents a BETTER 2FA implementation for android devices and thus represents a small improvement to our data and device protection.  So, we are using the ‘Protectimus Smart OTP’ app on our android devices.  We also know that this is just an IMPROVEMENT, it’s not an excuse to not further improve account/data security, but we think this is a step in the right direction.  Our thanks to the folks at Protectimus!

The app is FREE.  More information can be found at the Protectimus site – https://www.protectimus.com/

UPDATE 9-Sep-18: the app got broken by an Android P update, but the folks at Protectimus have been informed and are field-testing their fixed app now, so hopefully it will be back with us soon.  The issue only seems to affect Android P devices (i.e. our Pixel 2 XL devices).

Happy 2FA’ing.

Installing OnlyOffice Document Server in an Ubuntu 16.04 LXC Container

In our quest to migrate away from the relentlessly privacy-mining Microsoft products, we have discovered ‘OnlyOffice’ – a very Microsoft-compatible document editing suite.  Onlyoffice have Desktop and server-based versions, including an Open Source self-hosted version, which scratches a LOT of itches for Exploinsights, Inc for NIST-800-171 compliance and data-residency requirements.

If you’ve ever tried to install the open-source self-hosted OnlyOffice document server (e.g. using the official installation instructions here) you may find it’s not as simple as you’d like.  Firstly, per the official instructions, the onlyoffice server needs to be installed on a separate machine.  You can of course use a dedicated server, but we found that for our application, this is a poor use of resources as our usage is relatively low (so why have a physical machine sitting idly for most of the time?).  If you try to install onlyoffice on a machine with other services to try to better utilise your hardware, you can quickly find all kinds of conflicts, as the onlyoffice server uses multiple services to function and things can get messed up very quickly, breaking a LOT of functionality on what could well be a critical asset you were using (before you broke it!).

Clearly, a good compromise is to use a Virtual Machine – and we like those a LOT here at Exploinsights, Inc.  Our preferred form of virtualisation is LXD/LXC because of performance – LXC is blindingly fast, so it minimizes user-experience lag issues.  There is however no official documentation for installing onlyoffice in an lxc container, and although it turns out to be not straightforward, it IS possible – and quite easy once you work through the issues.

This article is to help guide those who want to install onlyoffice document server in an LXC container, running under Ubuntu 16.04.  We have this running on a System76 Lemur Laptop.  The onlyoffice service is resource heavy, so you need a good supply of memory, cpu power and disk space.  We assume you have these covered.  For the record, the base OS we are running our lxc containers in is Ubuntu 16.04 server.

Pre-requisites:

You need a dns name for this service – a subdomain of your main url is fine.  So if you own “mybusiness.com”, a good server name could be “onlyoffice.mybusiness.com”.  Obviously you need dns records to point to the server we are about to create.  Also, your network router or reverse proxy needs to be configured to direct traffic for ports 80 and 443 to your soon-to-be-created onlyoffice server.

Instructions:

Create and launch a container, then enter the container to execute commands:

lxc launch ubuntu:16.04 onlyoffice
lxc exec onlyoffice bash

Now let’s start the installation.  Firstly, a mandatory update (follow any prompts that ask permission to install update(s)):

apt update && apt upgrade && apt autoremove

Then restart the container to make sure all changes take effect:

exit                     #Leave the container
lxc restart onlyoffice   #Restart it
lxc exec onlyoffice bash #Re-enter the container

Now, we must add an entry to the /etc/hosts file (lxc should really do this for us, but it doesn’t, and only office will not work unless we do this):

nano /etc/hosts  #edit the file

Adjust your file to change from something like this:

127.0.0.1 localhost

# The following lines are desirable for IPv6 capable hosts
::1 ip6-localhost ip6-loopback
fe00::0 ip6-localnet
ff00::0 ip6-mcastprefix
ff02::1 ip6-allnodes
ff02::2 ip6-allrouters
ff02::3 ip6-allhosts

To (see bold entry):

127.0.0.1 localhost
127.0.1.1 onlyoffice.mybusiness.com

# The following lines are desirable for IPv6 capable hosts
::1 ip6-localhost ip6-loopback
fe00::0 ip6-localnet
ff00::0 ip6-mcastprefix
ff02::1 ip6-allnodes
ff02::2 ip6-allrouters
ff02::3 ip6-allhosts

save and quit.  Now we install postgresql:

apt install postgresql

Now we have to do somethings a little differently than at a regular command line because we operate as a root user in lxc.  So we can create the database using these commands:

su - postgres

Then type:

psql
CREATE DATABASE onlyoffice;
CREATE USER onlyoffice WITH password 'onlyoffice';
GRANT ALL privileges ON DATABASE onlyoffice TO onlyoffice;
\q
exit

We should now have a database created and ready for use.  Now this:

curl -sL https://deb.nodesource.com/setup_6.x | bash -
apt install nodejs
apt install redis-server rabbitmq-server
echo "deb http://download.onlyoffice.com/repo/debian squeeze main" |  tee /etc/apt/sources.list.d/onlyoffice.list
apt-key adv --keyserver hkp://keyserver.ubuntu.com:80 --recv-keys CB2DE8E5
apt update

We are now ready to install the document server.  This is an EXCELLENT TIME to take  a snapshot of the lxc container:

exit
lxc snapshot onlyoffice pre-server-install

This creates a snapshot that we can EASILY restore another day.  And sadly, we probably have to as we have yet to find a way of UPDATING an existing document-server instance, so whenever onlyoffice release an update, we repeat the installation from this point forward after restoring the container configuration.

Let’s continue with the installation:

apt install onlyoffice-documentserver

You will be asked to enter the credentials for the database during the install.  Type the following and press enter:

onlyoffice

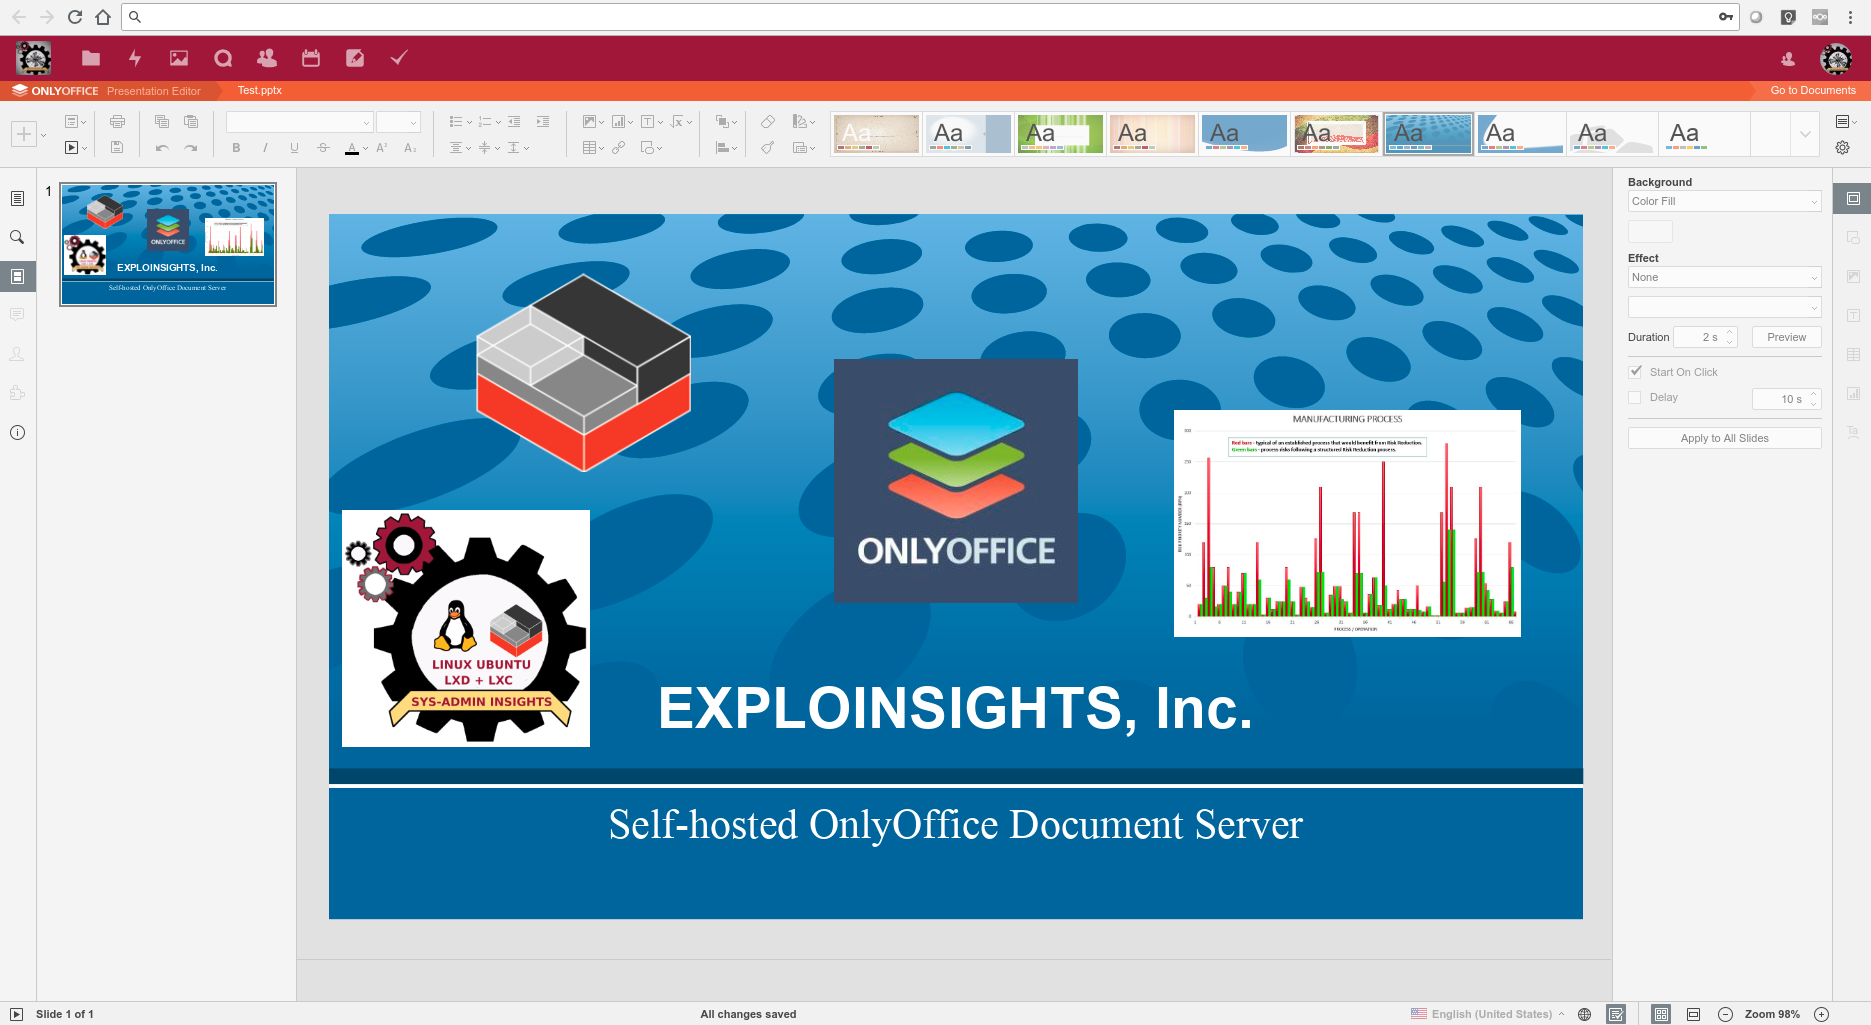
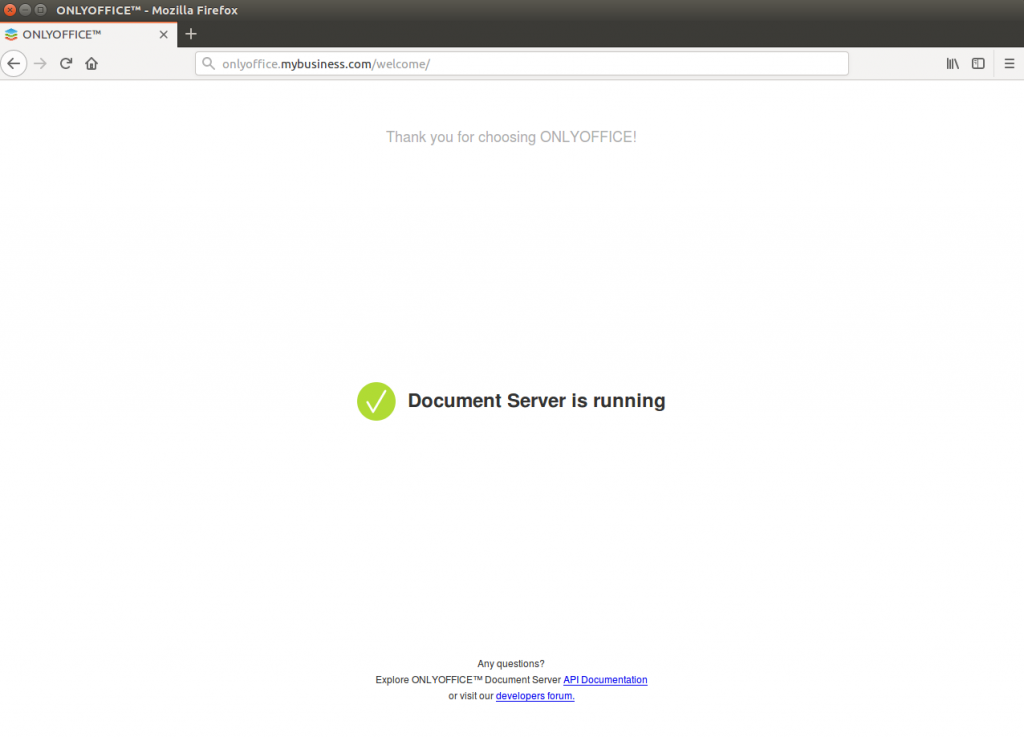
Once this is done, if you access your web site (i.e. your version of ‘www.onlyoffice.mybusiness.com’) you should see the following screen:

We now have a document server running, albeit in http mode only.  This is not good enough, we need to use SSL/TLS to make our server safe from eavesdroppers.  There’s a FREE way to do this using the EXCELLENT LetsEncrypt service, and this is how we do that:

Back to the command line in our lxc container.  Edit this file:

nano /etc/nginx/conf.d/onlyoffice-documentserver.conf

Delete everything there and change it to the following (changing your domain name accordingly):

include /etc/nginx/includes/onlyoffice-http.conf;
server {
  listen 0.0.0.0:80;
  listen [::]:80 default_server;
  server_name onlyoffice.mybusiness.com;
  server_tokens off;

  include /etc/nginx/includes/onlyoffice-documentserver-*.conf;

  location ~ /.well-known/acme-challenge {
        root /var/www/onlyoffice/;
        allow all;
  }
}

Save and quit the editor.  Then exeute:

systemctl reload nginx
apt install letsencrypt

And then this, changing the email address and domain name to yours:

letsencrypt certonly --webroot --agree-tos --email [email protected] -d onlyoffice.mybusiness.com -w /var/www/onlyoffice/

Now, we have to re-edit the nginx file”

nano /etc/nginx/conf.d/onlyoffice-documentserver.conf

…and replace the contents with the text below, changing all the bold items to your specific credentials:

include /etc/nginx/includes/onlyoffice-http.conf;
## Normal HTTP host
server {
  listen 0.0.0.0:80;
  listen [::]:80 default_server;
  server_name onlyoffice.mybusiness.com;
  server_tokens off;
  ## Redirects all traffic to the HTTPS host
  root /nowhere; ## root doesn't have to be a valid path since we are redirecting
  rewrite ^ https://$host$request_uri? permanent;
}
#HTTP host for internal services
server {
  listen 127.0.0.1:80;
  listen [::1]:80;
  server_name localhost;
  server_tokens off;
  include /etc/nginx/includes/onlyoffice-documentserver-common.conf;
  include /etc/nginx/includes/onlyoffice-documentserver-docservice.conf;
}
## HTTPS host
server {
  listen 0.0.0.0:443 ssl;
  listen [::]:443 ssl default_server;
  server_name onlyoffice.mybusiness.com;
  server_tokens off;
  root /usr/share/nginx/html;
  
  ssl_certificate /etc/letsencrypt/live/onlyoffice.mybusiness.com/fullchain.pem;
  ssl_certificate_key /etc/letsencrypt/live/onlyoffice.mybusiness.com/privkey.pem;

  # modern configuration. tweak to your needs.
  ssl_protocols TLSv1.2;
  ssl_ciphers 'ECDHE-ECDSA-AES256-GCM-SHA384:ECDHE-RSA-AES256-GCM-SHA384:ECDHE-ECDSA-CHACHA20-POLY1305:ECDHE-RSA-CHACHA20-POLY1305:ECDHE-ECDSA-AES128-GCM-SHA256:ECDHE-RSA-AES128-GCM-SHA256:ECDHE-ECDSA-AES256-SHA384:ECDHE-RSA-AES256-SHA384:ECDHE-ECDSA-AES128-SHA256:ECDHE-RSA-AES128-SHA256';
  ssl_prefer_server_ciphers on;

  # HSTS (ngx_http_headers_module is required) (15768000 seconds = 6 months)
  add_header Strict-Transport-Security max-age=15768000;

  ssl_session_cache builtin:1000 shared:SSL:10m;
  # add_header X-Frame-Options SAMEORIGIN;
  add_header X-Content-Type-Options nosniff;
 
  # ssl_stapling on;
  # ssl_stapling_verify on;
  # ssl_trusted_certificate /etc/nginx/ssl/stapling.trusted.crt;
  # resolver 208.67.222.222 208.67.222.220 valid=300s; # Can change to your DNS resolver if desired
  # resolver_timeout 10s;
  ## [Optional] Generate a stronger DHE parameter:
  ##   cd /etc/ssl/certs
  ##   sudo openssl dhparam -out dhparam.pem 4096
  ##
  #ssl_dhparam {{SSL_DHPARAM_PATH}};

  location ~ /.well-known/acme-challenge {
     root /var/www/onlyoffice/;
     allow all;
  }
  include /etc/nginx/includes/onlyoffice-documentserver-*.conf;
}

Save the file, then reload nginx:

systemctl reload nginx

Navigate back to your web page onlyoffice.mybusiness.com and you should get the following now:

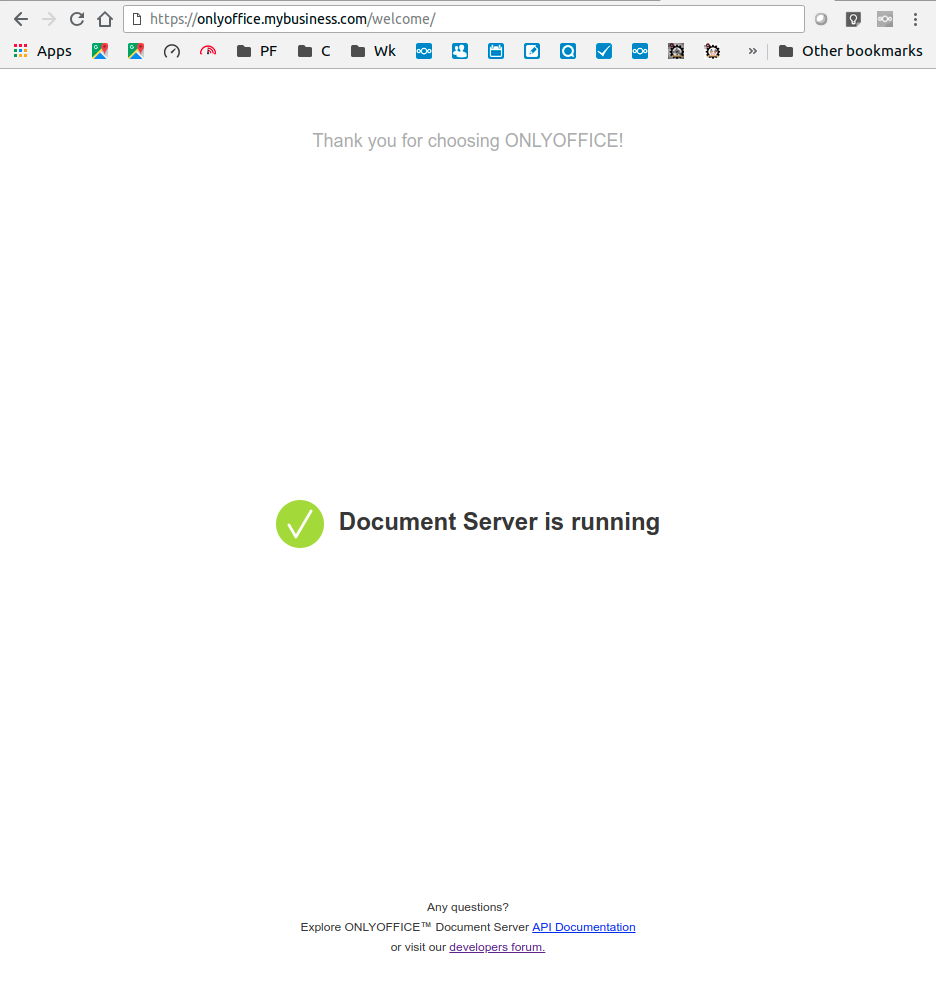
And if you do indeed see that screen then you now have a fully operational self-hosted OnlyOffice document server.

If you use these instructions, please let us know how it goes.  In a future article, we will show you how to update the container from the snapshot we created earlier.


A Place for Everything…

…And Everything in its Place!

EXPLOINSIGHTS, INC. (EI) has created this separate site for documenting the home-office IT infrastructure journey.  This keeps the main (‘www.exploinsights.com‘) business web-site free of non-core business material.  Hopefully this helps customers who are looking for EI core services and also those who are trying to find solutions to the IT problems that arise when trying to operate small-business office IT services, but are not interested in any paid-for services by EI.

It’s hard to run a small business, and it’s even harder if you have or want to self-host some of your IT services to better comply with complicated regulations such as data-residency requirements.  This site is intended to provide a record of some of the practices, methodologies, issues and solutions that the IT System Administrator has to address and employ to running server(s) that support the office administration.

All the IT-related posts that were published on the main website have now been moved to the WordPress instance running on the ‘www.sysadmin.exploinsights.com’ sub-domain (which, of course runs in an LXD container).  The EI Sys-Admin will also of course create more articles in the future and post them here, including software reviews for the services provided as part of the EI office infrastructure.

Fixing Security Issues – Low Stress, the LXD Way

Routine updates – but not really.  So we got a routine report from this excellent server scanning service @ www.scanmyserver.com
And it seems they did not like our Apache2 install on this site:

Scary stuff, given the incredible hacking risks of today.
Now updating the primary web server is not always a comfortable journey – you can break more than you can fix.  At www.exploinsights.com, we don’t like to live dangerously, so we took full advantage of the snapshot capabilities of LXD to update the server.  The WordPress instance that operates the public web site (what you are reading now!) is running in an LXD container, so here’s the hard server update today, exactly as employed from the primary Ubuntu server:

lxc snapshot WordPress
lxc exec WordPress bash
add-apt-repository ppa:ondrej/apache2
apt update
apt upgrade
exit
logout

This created a full working copy of the exploinsights web site container (so it can be restored if it breaks during the update), then updated the repository so the instance uses the latest and greatest version of apache2, then it updated the entire web server, including ‘apache2’.
Note that none of these commands require root access on the main server, so the risk to actual hardware running the primary linux OS is very very low.  Root is needed in the LXD container, but that is separate from the host OS by design.  Excellent security management!
After that, we accessed the site to make sure it works (and it does)…and then wrote this article to share the low-risk experience.  So it WORKED!  It took longer to write this article than it took to perform the update – that’s our kind of IT maintenance.
The web site should receive a much better security score when scanmyserver.com revisits (in about a week unless we initiate it manually).  But here’s the results from a similar scan, which was satisfactory:

No high risk issues, but probably still more work to do, so no surprises there.  Since the web site does NOT host sensitive or mission-critical information, we will address additional lower risk issues routinely.  But for our mission-critical assets, we like to fix things immediately or at least ASAP.  Our cloud file server gets a much better score, and hopefully always will:
We love containers for running and updating key IT infrastructure as they continue to take the stress out of important and potentially system-breaking updates

UPDATE 14th July:

So we just got a new vulnerability report: 😊

Progress.  And an A+ rating is not as shabby as we have seen elsewhere for even government web servers.  Of course, this does NOT mean that we can relax.  You have to keep looking for vulnerabilities and address them as you find them, and you always find more.  But this is progress.  Thanks LXD!

Why you should use Two-Factor credentials

This:
Backdoored Python Library Caught Stealing SSH Credentials
https://search.app.goo.gl/Sg2J7
If you have an SSH private key that is NOT password protected (i.e. a second factor) then your ssh logins can be completely stolen via this malware.
But even if you do protect your private key, maybe you should also look at two-factor ssh login using Google authenticator, which makes a private key just a small part of the authentication process.